1. THE ALLURE OF THE OIL FINISHED STOCK
2. MYTHS, LEGENDS AND REAL SECRETS
- debunks the so called trade secrets and shows how linseed oil works and how to exploit its natural properties
3. WOOD- THE STARTING POINT
- assess the wood before starting, avoid pitfalls like veneers and risking the value of antiques. Explains the difference in finishing new wood and refinishing old stocks
4. TOOLS AND MATERIALS
- what is really needed to get outstanding results
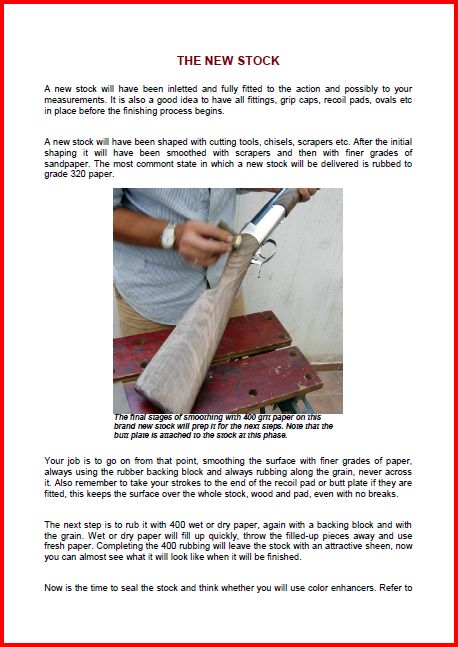
5. THE NEW STOCK
- tackling a new totally unfinished stock
6. STRIPPING, CLEANING, DENT RAISING
- see how to strip, how to raise dents using simple tools

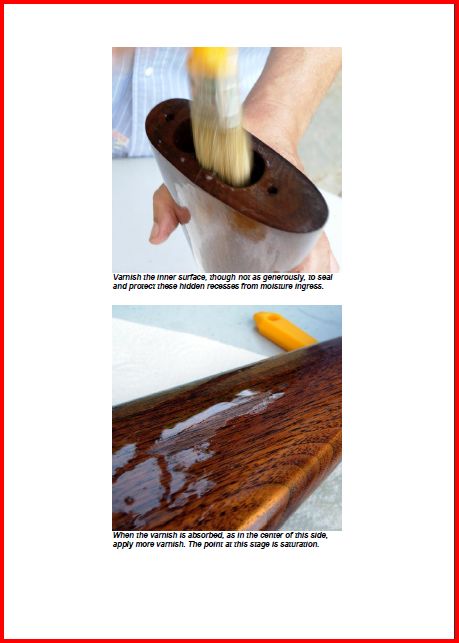
7. SEALING
- using modern varnish to build a deep moisture barrier in the wood
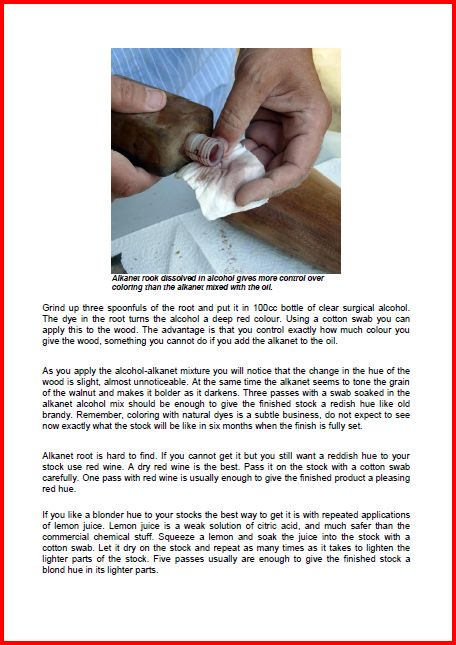
8. COLORING
- simple home made, non toxic, coloring agents
9. EGG WHITE- THE ORGANIC OLD TIME FILLER
- the traditional wood filler, used by the great masters of painting and furniture makers of the past to fill the pores in wood

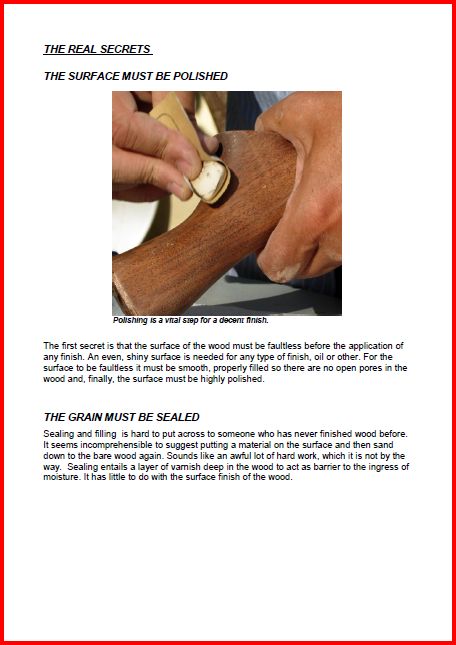
10. POLISHING IS VITAL
- the foundation of wood finishing shown in detail
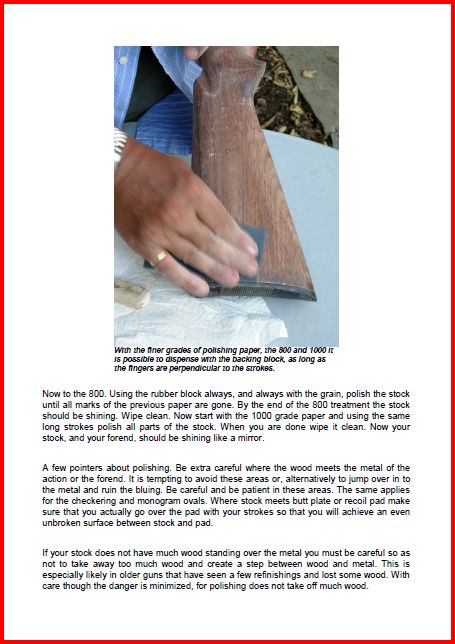
11. APPLYING LINSEED OIL
- how to apply the oil is important, and here you see the true hand rubbed way
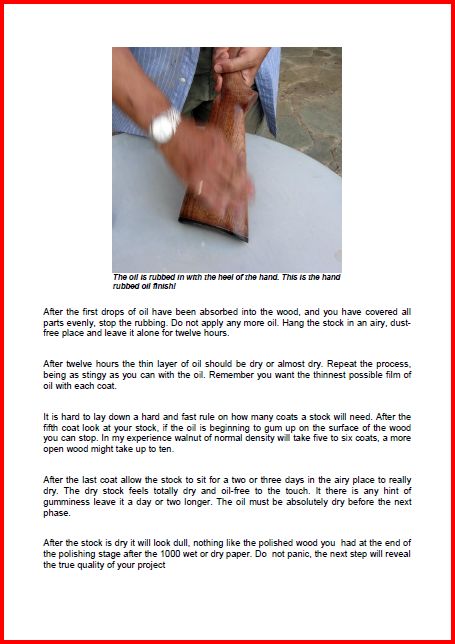
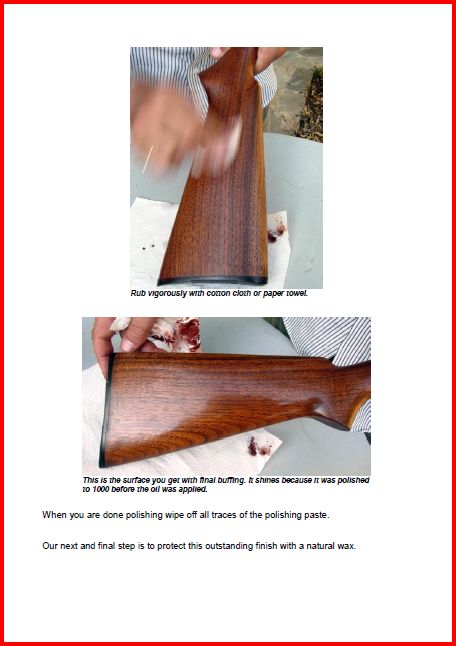
12. THE FINAL BUFFING
- make your own buffing compound to give your stocks a brilliant surface
13. WAXING WITH NATURAL BEESWAX
- make your own wax paste to protect and enhance wood surfaces
14. UPGRADING THE FACTORY FINISH
- a simple and fast way to upgrade the factory matt fiish to a full linseed oil finish
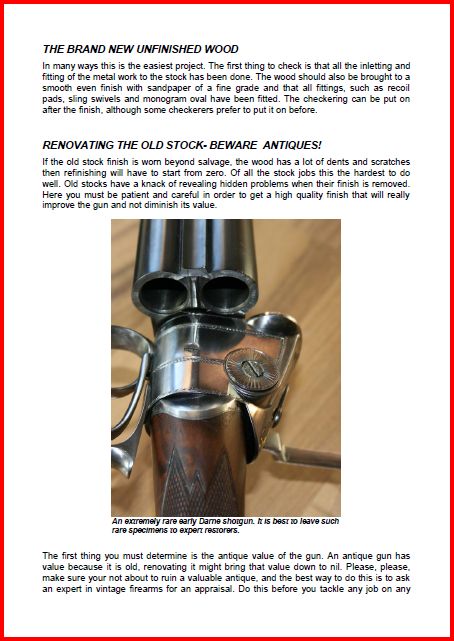
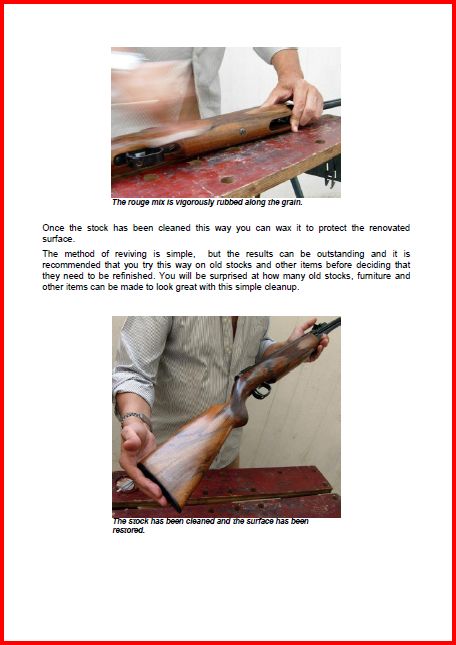
15. RENOVATING AN OLD FINISH
- an old and tired stock can be revived to almost new brilliance
16. THE PROCESS FROM START TO FINISH
- step by step photo presentation starting from bare wood to a fully finished hand rubbed stock